
Freeze-drying is a great way to preserve the spicy goodness of chili peppers, ensuring you have them on hand whenever a burst of heat is needed.
Freeze-drying chili peppers dramatically extends their shelf life while preserving the nutrients they contain. It also makes them lightweight and easy to store, all while maintaining color and flavor!
If you have a glut of chili peppers and are looking for the best way to preserve them, learn how to freeze-dry chili peppers and make chili powder here!
How to Freeze-Dry Chili Peppers

Chili peppers are a great food to freeze-dry, and while there are many ways to process your chili peppers ready for the freeze-dryer, the steps are essentially: clean, cut, pre-freeze, freeze-dry.
I grow my own chilies and harvest them throughout the season, freezing them whole (with just the stem removed), ready for large batch processing as they build up.
This means my chilies are often already frozen when I chop them up, ready for the freeze-dry trays. You can do it this way or just process the fresh chilies without freezing first.
Don’t have a freeze-dryer yet and wondering if this appliance is right for you? Read my two-year, hands-on, no-holds-barred review of the Harvest Right freeze dryer here.
Required Materials:
- Knife
- Cutting board
- Food Processor (optional)
- Gloves (optional)
- Home Freeze-Dryer (and trays)
- Blender (for powdering – optional)
- Mask (optional)
- Eye protection (optional)
- Mylar bags or Mason jars
- Oxygen absorbers
- Impulse Sealer
- Spice jar (optional)
- Moisture absorber (optional)

- Freeze dry up to 10,000 lbs of fresh food every year.
- Preserve your gardens harvest & prepare for emergencies.
- Make your own camping & hiking meals.
- Freeze dry your own pet food.
1. Harvest/Purchase Chili Peppers & Clean
If you are growing your own chili peppers, simply harvest them while in their prime.
This is when the chili has turned its mature color (e.g., red, yellow, orange, purple, or, in some cases, green), the skin is smooth, and the pepper is firm to the touch but not overly hard.

If you purchase chili peppers, look for plump peppers with smooth, glossy skin. If they are dull or wrinkling, they may already be past their prime.
Give the chilies a good wash in clean water and allow them to dry.
2. Remove the Stems of the Chili Peppers
Next, you will remove all the green stems from the chili peppers.
To do this, cut off the stem using a sharp knife. You may want to wear gloves during this process, depending on how spicy your chilies are.
After removing the stems, I typically freeze my chilies whole until I have a big enough batch to move on to the next stage.
You can move straight to the next step without freezing if you already have the entire quantity of chili peppers you want to freeze-dry.
3. Chop/Process the Chili Peppers (Optional)
You can skip this process and freeze your chili peppers whole if desired, but I recommend at least cutting them in half lengthways to aid the drying process, particularly of the seeds.
Speaking of seeds, you can leave them in or remove them if preferred.
The white flesh that houses the seeds is the hottest part of the chili, so by removing the seeds, you often remove quite a bit of the spiciness.

I took my pre-frozen chilies (with the stem already removed) and roughly chopped them in my Breville Sous Chef using the large S-blade filling all four trays of my Medium Harvest Right Freeze Dryer with the roughly chopped chilies.
Each tray held about 2.2 lbs of chili peppers.

You can also chop them up by hand, but I would only recommend this if you are doing a much smaller batch!
I have also processed smaller batches by simply slicing the chili pepper in half lengthways.
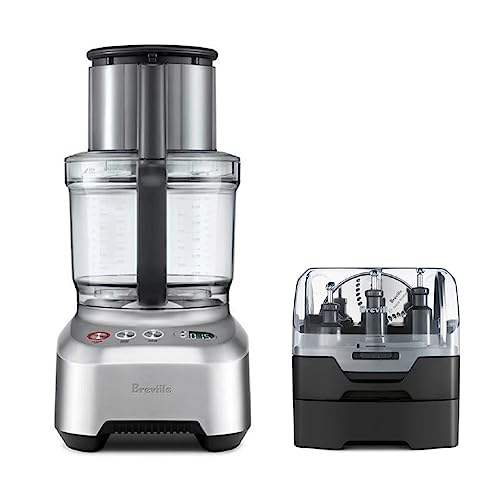
Included With the 16 Cup Food Processor:
- 12mm Dicing Kit
- Peeling Disc
- Micro-Serrated S-Blade
- Reversible Shredding Disc
- Variable Slicing Disc
- Julienne Disc
- French Fry Cutting Disc
- Whisking Disc
- Mini Blade & Dough Blade
4. Pre-Freeze the Chili Peppers

At this stage, you can go ahead and put your prepared trays in the deep freeze.
It is a good practice to pre-freeze your food before you put it in the freeze-dryer since it will shorten the cycle time.
Although I had already frozen my chilies (before batch processing), I still popped them back into the deep freeze to ensure they were completely frozen before putting them in the freeze-dryer.
5. Run the Freeze-Dry Cycle

This is the easiest step because the freeze dryer does all of the work!
Put your prepared trays of chili peppers into the freeze-dryer, and commence a normal cycle (making sure you close the drain valve!).

As a rough guide, the dry cycle for four full medium-sized trays of chili peppers (2.2 lbs per tray) took 30 hours to complete, with an additional 8 hours of Extra Dry Time.
6. Powder the Chili Peppers (Optional)

Once the cycle was completed and I was sure there was no residual moisture left in the chili peppers, I processed them into a coarse powder using a Vitamix.
You can skip this step if you prefer to store your chili peppers without powdering them.
Be aware that during this process, the fine chili powder can become very irritating to your airways and eyes. The chili peppers I grow are not particularly spicy but are still very irritating when exposed to too much of the airborne powder.
For this step, you might like to wear gloves, eye protection, and a respirator mask, especially if you are dealing with very spicy peppers.
It is also a good idea to powder and package the chili powder in a well-ventilated space.
7. Package the Chili for Storage

The final step in the process is to package your chili into long-term storage bags or jars.
I packaged mine into small Harvest Right Mylar bags with a 300cc oxygen absorber, which I sealed using an Impulse Sealer.
I also stored a small amount of the chili powder in a spice jar for immediate use in the kitchen, to which I added a small moisture absorber (since I live in a humid climate).

Something to note is that chili powder stored in just a spice jar with a moisture absorber will gradually lose its vibrant color and smell compared to chili powder stored in a Mylar bag.
In the image below, you can compare two batches of chili powder freeze-dried on the same date, one stored for months in a spice jar, the other from a freshly opened Mylar bag.
Correct storage is crucial for longevity!

Frequently Asked Questions
The choice of freezing or drying your chili peppers will be influenced by available storage space and desired storage duration. Freeze-drying peppers enables storage for up to 25 years without electricity. Frozen peppers will require more storage space and have a shorter lifespan.
The duration of any freeze-dry cycle will depend on several factors, including the volume of food and moisture content, outside temperatures, and humidity levels. As a general guideline, it took 38 hrs in a humid climate to freeze-dry 4 medium trays, each containing 2.2 lbs of chili peppers.
While dehydrating chili peppers is a good way to extend their shelf-life, this drying method cannot compete with freeze-drying. Dehydrated chili powder generally has a shelf-life of 1-3 years, while, if properly stored, freeze-dried chili powder may retain its freshness for up to 25 years!
If you store your freeze-dried chili peppers whole or in chunks, you can simply rehydrate them and add them to meals the same way you would use fresh chili peppers. If you powdered your chili peppers, use this powder the same way you would use purchased or dehydrated chili pepper powder.
Turn Up the Heat!
If you want to ensure you always have plenty of chili peppers on hand to add heat to any dish, freeze-drying is an excellent way to preserve them.

Not only is freeze-drying the superior method for extending the shelf-life of your chilies, but it does so while retaining the color and nutritional content of freshly picked peppers!
If you have chili peppers to spare, start freeze-drying them today and turn up the heat in your kitchen!
Don’t have a freeze-dryer yet and wondering if this appliance is right for you? Read my two-year, hands-on, no-holds-barred review of the Harvest Right freeze dryer here.
- Freeze dry up to 10,000 lbs of fresh food every year.
- Preserve your gardens harvest & prepare for emergencies.
- Make your own camping & hiking meals.
- Freeze dry your own pet food.


