
Everything tastes better with a little spice.
Once you learn about canning spicy plum sauce, you can add zip to almost any meal.
This recipe contains several ingredients that blend beautifully. However, they will need time to do so.
Set aside a little more than 2 hours to pull this beautiful sauce together.
How to Make and Water Bath Can Spicy Plum Sauce
You won’t need any special equipment for this recipe, and it’s suitable for beginners.
Equipment Needed
- Colander
- Sharp knife
- Stainless steel saucepan
- Small saucepan
- Water canner with lid
- Eight half-pint jars with lids and rings (for a whole canner load)
- Jar lifter
- Lid lifter
- Canning funnel
- Ladle
Ingredients
- 10 cups chopped pitted plums
- 2 tablespoons chopped and seeded chilis
- ¾ cup chopped onion
- 2 chopped garlic cloves
- 2 cups brown sugar
- 1 cup white sugar
- 2 tablespoons mustard seed
- 1 tablespoon salt
- 1 teaspoon dried ginger
- 1 cup cider vinegar
Prep Time
15 minutes
Cook Time
About 2 hours
Canning Time
20 minutes
Step 1: Wash and Chop Plums
This savory and tasty sauce works with all types of plums, and you don’t have to peel them.
I use red plums grown on my property, but this recipe also works with firm plums like Damson.

Since we’re leaving the skins on, we need to wash them carefully. I rinse my plums under warm water and shake them dry.
Then, chop your plums in half and remove the pits. Then, chop them into small pieces.
Step 2: Wash and Chop Peppers
You’ll need at least one hot pepper to give this recipe zip.
I used jalapeno, but you could also use poblano or Anaheim peppers instead. Wash them under a stream of warm water, and then cut them in half.
Shake out the seeds, and then chop the remaining pepper into small pieces.

Step 3: Chop Onion and Garlic
You’ll also need ¾ cup of chopped onions for this recipe.
I used white onions, as they’re very crisp and sharp. But you could also use red onions for a more mellow and gentle flavor.
You’ll also need two garlic cloves for this recipe.
Remove the skins and peel, and then chop them into very small pieces.
Step 4: Measure Dry Ingredients
I like to measure all of my ingredients in advance, so I don’t have to scramble to dig them out later.
You’ll need quite a few things for this particular recipe, as it has a very complex flavor.
Measure out 2 cups of brown sugar, 1 cup of white sugar, 2 tablespoons of mustard seed, 1 tablespoon of salt, and 1 teaspoon of ground sugar.
You can place all of them in one bowl, if you’d like.
Step 5: Measure Wet Ingredients
You’ll only need one wet ingredient for this recipe.
Measure 1 cup of cider vinegar. I used apple cider vinegar for zest.
Don’t substitute something sweeter (like wine vinegar), as it won’t provide you with the right flavor and zing.
Step 6: Combine All Ingredients
You’ve measured very carefully.
Now, add all of them to your stainless steel pan and stir to mix them completely.
I like to keep the heat off at this stage, so I can ensure the sugar doesn’t burn if it’s at the bottom of the pan over the heat.

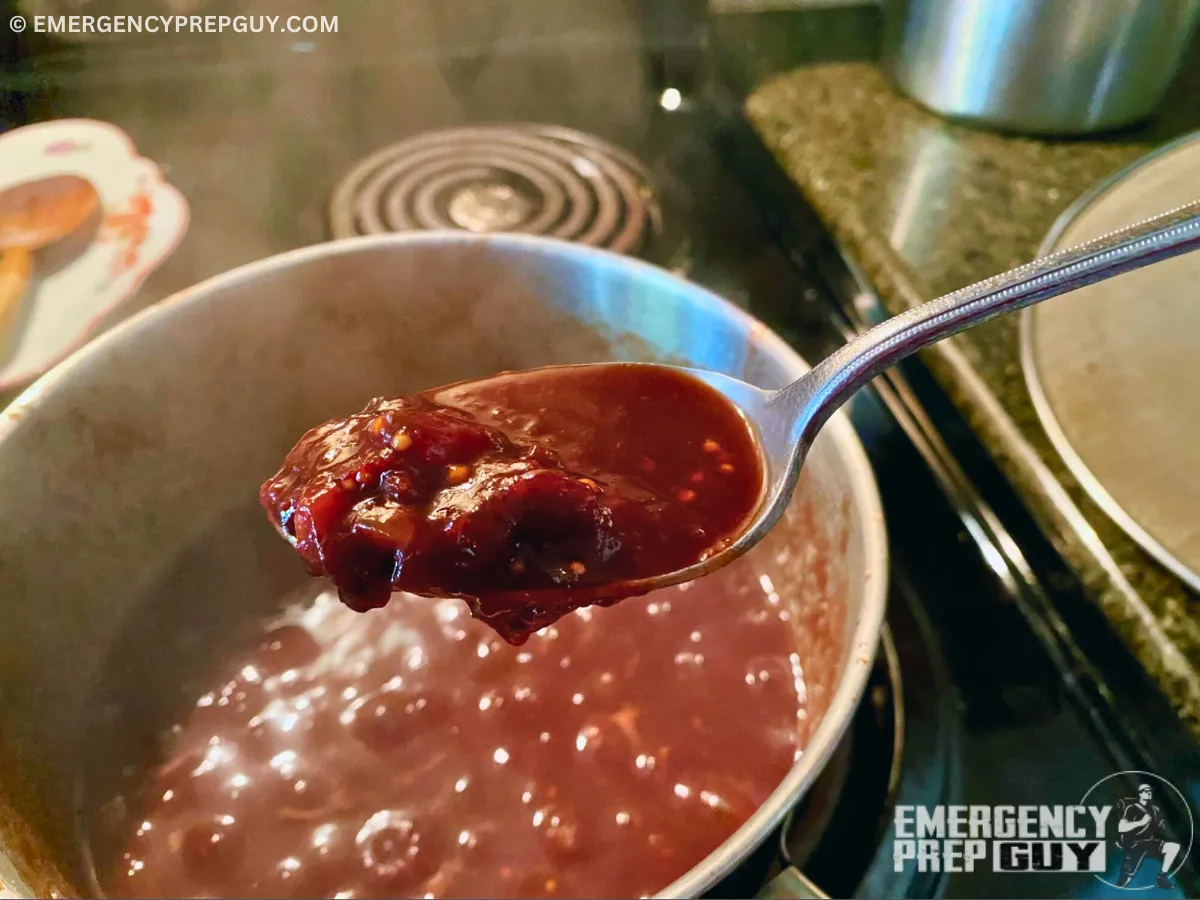
Step 7: Boil and Cook Down
With your ingredients fully mixed, turn the burner on medium-high beneath the pot.
Stir the mixture constantly to ensure it doesn’t scorch. That can happen sooner than you think if the heat is cranked up.
Cook the mixture for nearly 2 hours while stirring regularly. The sauce will be ready when it’s really thick and sticking to the spoon.
Step 8: Prepare Jars and Lids

While your plum sauce cooks down, turn to your jars and lids. They should be clean and sterile when the sauce has cooked down.
You’ll need 8 half-pint jars for a full batch of this recipe.
Start by inspecting your jars. Set aside any jars that are cracked, chipped, or otherwise damaged. Then, wash your jars in hot water and soap.
Place the clean jars in the canner, and fill it with water. Place the canner over medium heat and simmer the jars until you need them.
Place your lids in a saucepan over low heat. Warm them to allow the adhesive to soften until you need them.
Step 9: Fill Jars
When your sauce is cooked and ready, remove your jars from the canner with your jar lifter. Place them on a cutting board (not the cold countertop).
Then, remove your sauce from the heat and place it close to your jars.
Place your canning funnel in one jar and fill it with your prepared sauce. Leave a ½ inch of space at the top for your sauce to expand inside the canner.
Work jar by jar until all of your sauce has been placed.

Step 10: Apply and Secure Lids
Plum sauce can be thick and sticky. Even though I use a canning funnel, I often splatter sauce on the edge of the jars.
Leaving it there can stop the lids from sealing properly. Dampen a paper towel in water and run it around the edge of the jar to remove anything that spilled.
Use your lid lifter to remove lids from the jars. Put a lid on each jar, and use rings to keep them in place. Twist them down until they’re finger-tight.
Step 11: Process Jars
Place your prepared jars in the canner, and ensure they’re covered with at least an inch of water. Start the timer when the water is boiling.
Process your jars for 10 minutes. Adjust for your elevation as needed.
Step 12: Rest Jars
When processing is complete, take the lid off the canner and turn off the heat. Leave the jars in place for 5 minutes to allow the contents to stabilize.
Use your jar lifter to remove the jars from the canner. Ensure that you keep the jars fully upright while you move them, and place them on a cutting board or towel to cool.
Leave them in place for 24 hours.
Step 13: Test and Label Lids
After 24 hours, the contents inside your jars will be fully stabilized. The lids should be tightly affixed and slightly depressed at the center.
I like to remove the rings from my jars and push on them to ensure they don’t pop or click.
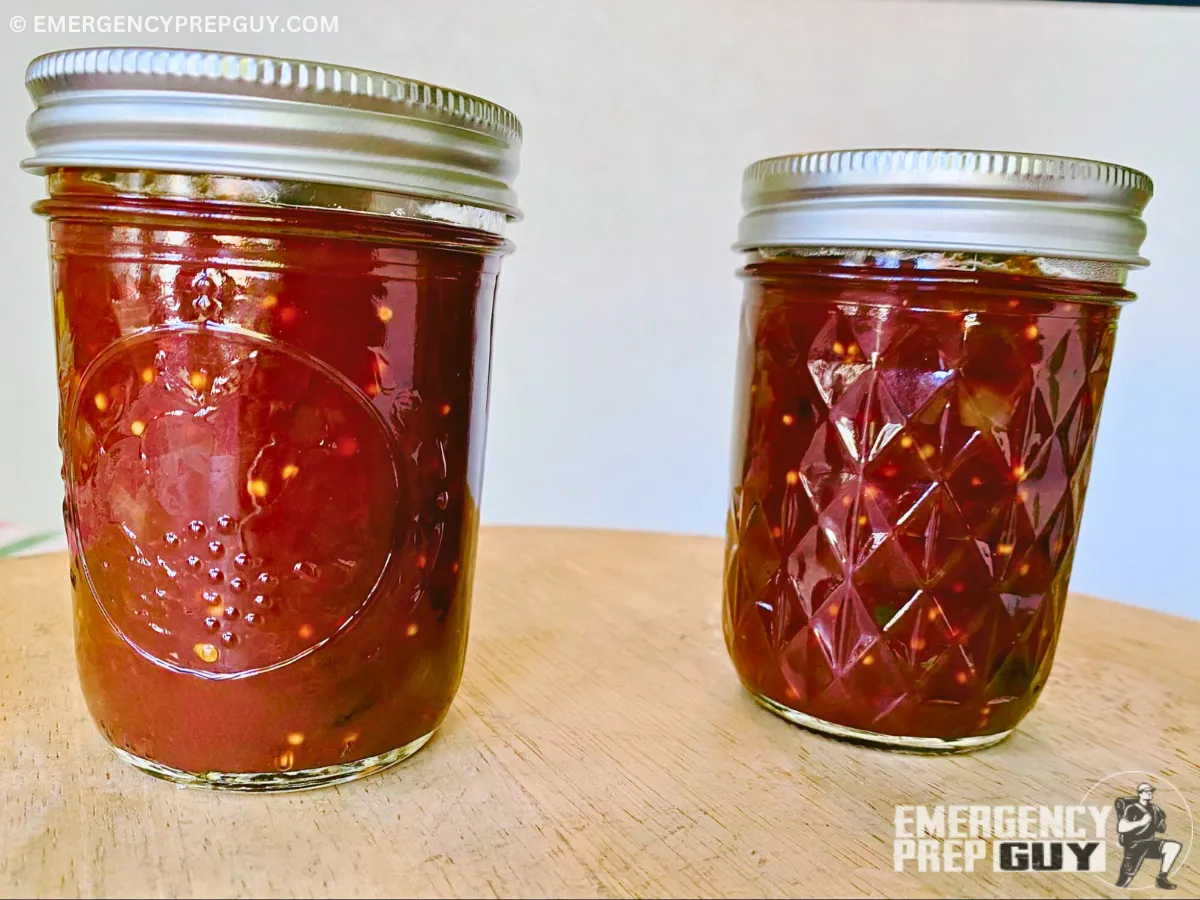
Write the date on each lid and prepare them for storage. I like to keep the rings on my jars, as they’re easier to stack.
Place your labeled jars in a dark and cool space for storage. I use my basement for this.
How Long Does Canned Plum Sauce Last?
The USDA says foods preserved in a water canner should be used within a year. Keeping track of plum sauce is especially important.
If you keep it too long, the plum sauce will become discolored (and it won’t look appetizing at all). Keeping sauce too long can also make it lose flavor.
Ideas for Using Spicy Plum Sauce
This tasty plum sauce works well in all sorts of recipes. Here are a few of my favorite ways to use it:
- Poach seafood (like scallops) in spicy plum sauce.
- Drizzle sauce on salad rolls filled with cucumbers and carrots.
- Serve plum sauce next to sausage for easy dipping.
- Replace plum sauce for catsup to dunk French fries or tater tots.
- Cook down spicy plum sauce as a glaze for tofu.
- Add plum sauce to vegetable stir fry. (It’s especially good with broccoli!)
- Swirl plum sauce into mac and cheese.
- Use plum sauce as barbeque sauce for chicken or turkey.
- Add zip to grilled cheese sandwiches with plum sauce.
Equipment
Ingredients
- 10 cups chopped pitted plums
- 2 tablespoons chopped and seeded chilis
- ¾ cup chopped onion
- 2 chopped garlic cloves
- 2 cups brown sugar
- 1 cup white sugar
- 2 tablespoons mustard seed
- 1 tablespoon salt
- 1 teaspoon dried ginger
- 1 cup cider vinegar
Instructions
Wash and Chop Plums
- Rinse plums under warm water. Cut each plum in half, remove the pits, and chop into small pieces.
Wash and Chop Peppers
- Wash at least one hot pepper (e.g., jalapeño) under warm water. Halve, remove the seeds, and chop into small pieces.
Chop Onion and Garlic
- Chop ¾ cup of onion (white or red, based on preference) and finely chop two garlic cloves.
Measure Dry Ingredients
- In a bowl, measure 2 cups brown sugar, 1 cup white sugar, 2 tablespoons mustard seed, 1 tablespoon salt, and 1 teaspoon dried ginger.
Measure Wet Ingredients
- Measure 1 cup of cider vinegar.
Combine All Ingredients
- Place the chopped plums, peppers, onion, garlic, the measured sugars, mustard seed, salt, dried ginger, and cider vinegar into a stainless steel saucepan. Stir gently to combine all ingredients evenly.
Boil and Cook Down
- Set the burner to medium-high heat. Bring the mixture to a boil, stirring constantly to prevent scorching. Lower the heat and simmer for nearly 2 hours, stirring regularly until the sauce thickens and coats the back of a spoon.
Prepare Jars and Lids
- While the sauce cooks down, wash and inspect eight half-pint jars for damage. Sterilize the jars in your water canner filled with hot water over medium heat. Warm the lids in a small saucepan over low heat to soften the adhesive.
Fill Jars
- Once the sauce has thickened, remove the jars from the canner using a jar lifter and place them on a clean, warm surface (avoid cold countertops). Using a canning funnel and ladle, fill each jar with the hot sauce, leaving ½ inch of headspace for expansion. Remove any air bubbles by running a knife around the jar edges.
Apply and Secure Lids
- Wipe the rims of each jar with a damp paper towel to remove any spills. Place the warmed lids on the jars and screw on the rings until they are finger-tight.
Process Jars
- Place the filled jars back into the water canner, ensuring they are covered with at least 1 inch of boiling water. Process for 10 minutes (adjust the time for your elevation if necessary).
Rest Jars
- After processing, turn off the heat and let the jars sit in the canner for 5 minutes to stabilize. Remove the jars with a jar lifter and place them upright on a cutting board or towel to cool undisturbed for 24 hours.
Test and Label Lids
- After 24 hours, check each jar by pressing the center of the lid. If the lid does not pop back, it is sealed properly. Label each jar with the date and store them in a cool, dark place.
Notes
- Flavor Development: The sauce’s flavor deepens as it cooks down, so allow the full 2 hours for optimal thickness and taste.
- Jar Preparation: Always inspect and sterilize jars to ensure a safe canning process.
- Storage: Properly canned plum sauce should be used within a year. Always check seals and inspect for any signs of spoilage before use.


